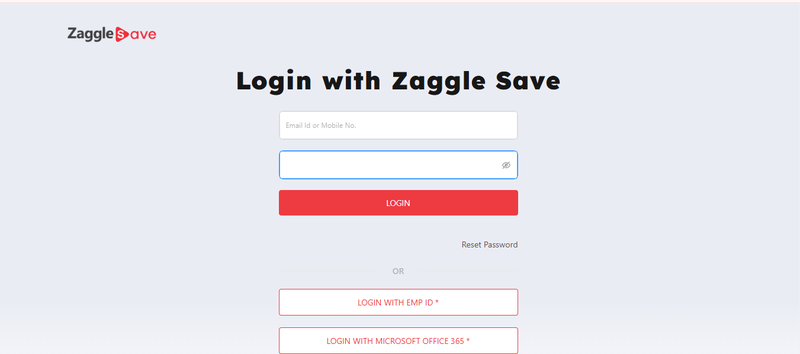
Step 1: Log Into SAVE/EMS Dashboard.
1.1: Navigate to the SAVE/EMS Dashboard.
1.2: Log in with your registered email address and password on the SAVE/EMS
Dashboard to access the end-to-end journey of Form 16A & B.
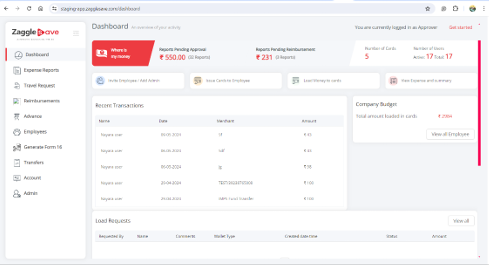
Step 2: Save/EMS dashboard
2.1: Once you click on the login button the Save/EMS dashboard will be open.
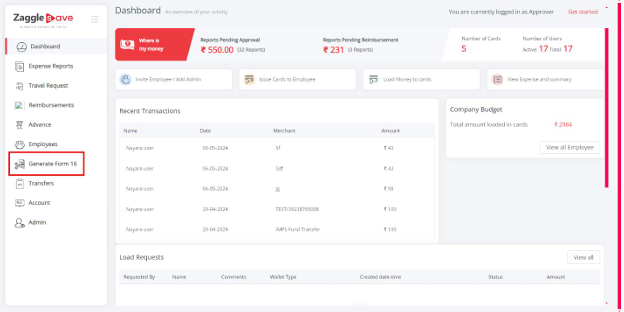
Step 3: Generate Form 16
3.1: After logging in, click on "Generate Form 16".
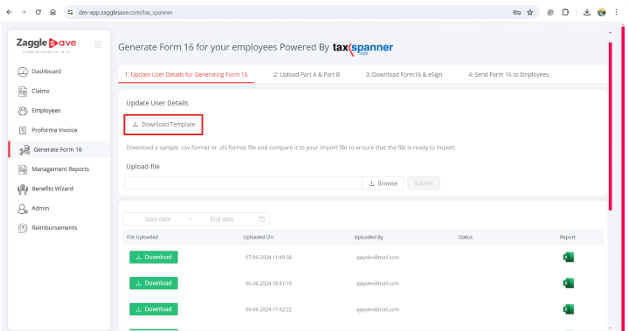
3.2: The "Generate Form 16 for Your Employee - Powered by TaxSpanner" screen will
open.
Step 4: Update user details for Generating Form 16
4.1: Download the user detail template by clicking "Generate User Details Template".
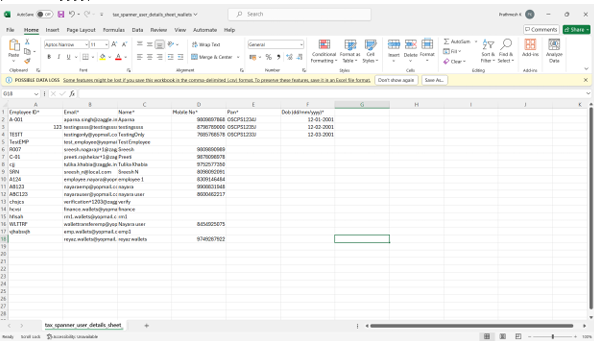
Step 5: Download the excel template
5.1: Fill in the required details in the Excel template.
5.2: The Excel template will contain Employee ID, Email, Name, Mobile No, PAN and
DOB (dd/mm/yyyy).
5.3: It is mandatory to fill all the fields in the Excel file; otherwise, an error message will
appear.
Step 6: Upload excel file
6.1: Click on "Browse" and select the filled Excel file from your computer.
6.2: Click "Submit" to upload the file.
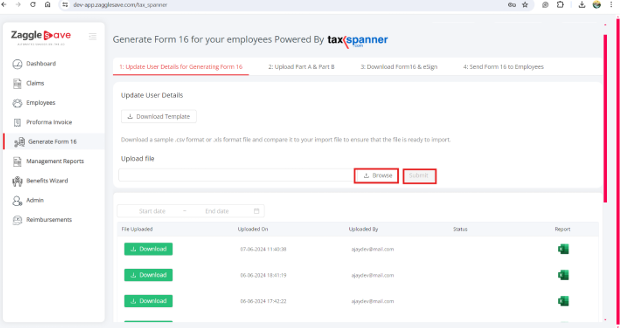
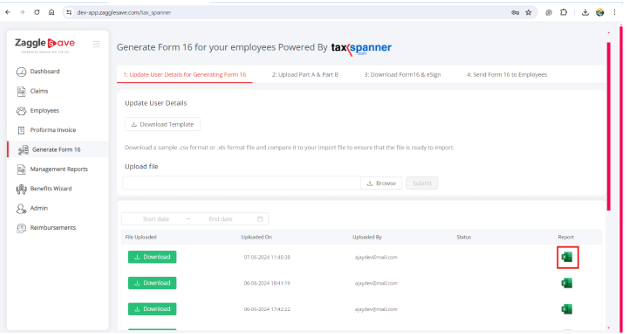
Step 7: Check upload status
7.1: If the file is uploaded successfully, a confirmation message will be displayed.
7.2: To check the upload status, scroll down to view the file list.
7.3: If an error occurs, click on the Excel icon under the Report section to view details of
the error.
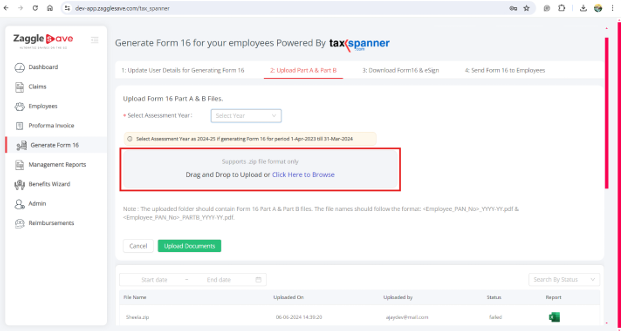
Step 8: Upload Part A & Part B
8.1: A screen containing the details for uploading Form 16 Part A and Part B will open.
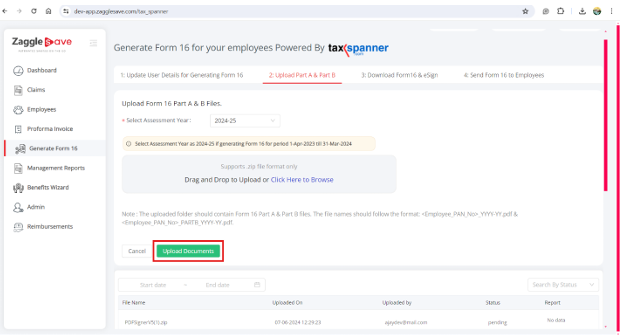
8.2: Select the Assessment Year from the dropdown menu.
8.3: Select the desired year and click on it.
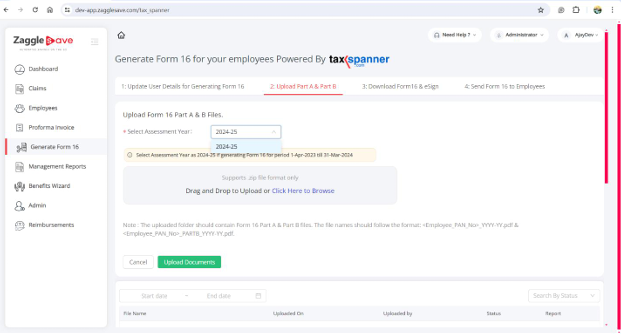
Step 9: File format
9.1: Once the year is selected, upload the Form16 Part A and Part B in .zip file.
9.2: The uploaded folder should contain Form 16 Part A & Part B files.
9.3: The file names should follow the format: Employee_PAN_No_YYYY-YY.pdf &
Employee_PAN_No_PARTB_YYYY-YY.pdf.
Step 10: Upload documents
10.1: Click on the "UPLOAD DOCUMENT" button to submit it.
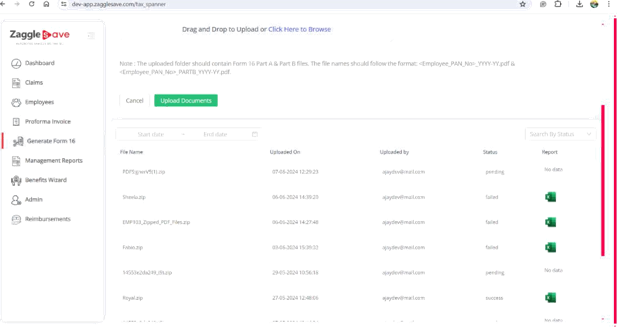
Step 11: Verify upload status
11.1: Once uploaded, a confirmation pop-up will appear.
11.2: To verify the upload status, check whether the file appears in the uploaded list.
11.3: If the upload fails, check the error message displayed and retry the upload.
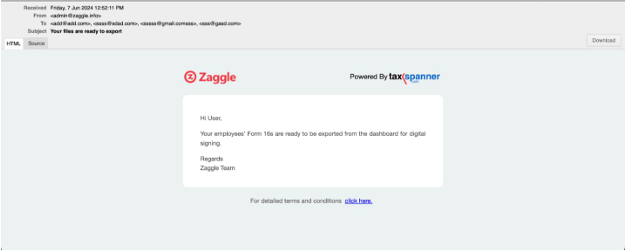
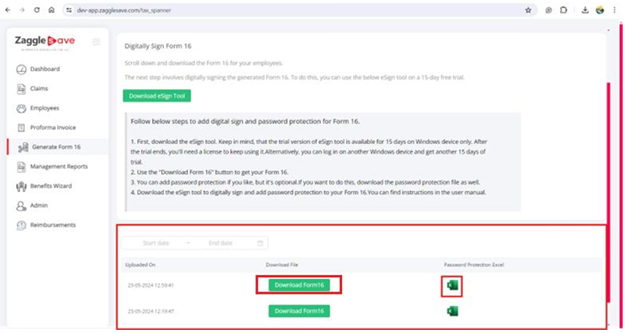
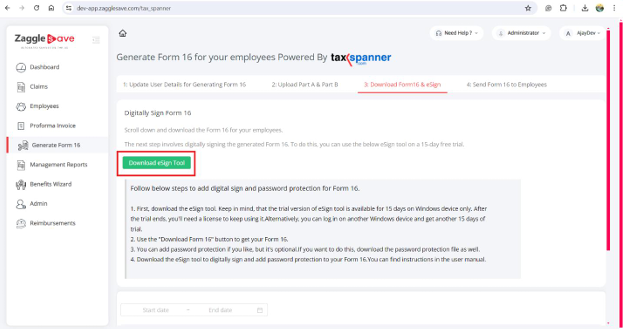
Step 12: Download Form16 and eSign
12.1: Click on Download Form 16 and .eSign.
12.2: In this step, you can download Form 16 and digitally sign it.
12.3: You will receive an email from the Zaggle admin stating that the file is ready to
download.
Step 13: Download file
13.1: A .ZIP file containing Form 16 will appear.
13.2: Click on the download icon to save the file.
13.3: If password protection is required, download the Password Protection Excel File.
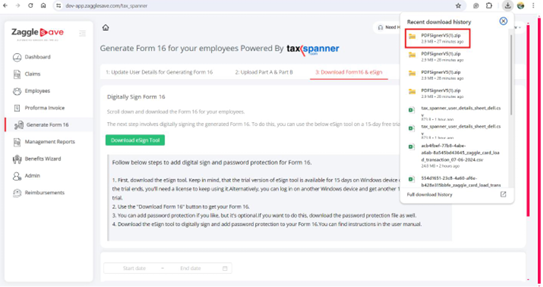
13.4: Click on "Download eSign Tool" to obtain the digital signing tool.
13.5: Install the eSign tool and follow the included PDF manual for usage instructions.
Step 14: Download esign tool
14.1: click on the "Download eSign Tool" button to download the tool for signing Form
16.
Step 15: Install the esign tool
15.1: Extract and install the eSign tool.
15.2: There will be a user manual PDF in the folder with instructions on how to acces
the eSign tool application.
15.3: If you want to add password protection, you can refer to it as well.
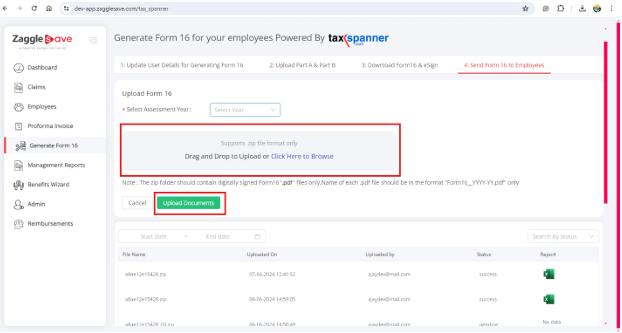
Step 16: Send Form 16 to Employees
16.1: In this step, you can upload the digitally signed and password-protected
(Optional) Form 16 PDFs in .ZIP file format.
16.2: Employees using the EMS/SAVE mobile app will receive the password-protected
Form 16 in their app and via email.
16.3: Employees who are not opting for EMS/SAVE will only receive the Form 16 via
email.
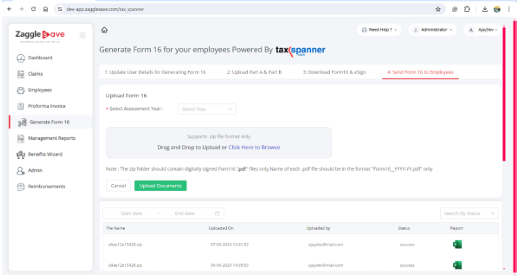
Step 17: Upload digitally signed form16
17.1: Select the Assessment Year from the dropdown menu.
17.2: Once the year is selected, Upload the digitally signed and password-protected
Form16 PDFs in .ZIP file format.
17.3: The ZIP file should only contain Form 16 files in the format:
17.4: Form16_Employee_PAN_No_YYYY-YY.pdf.
17.5: Then click on the submit button to upload the .zip file format.
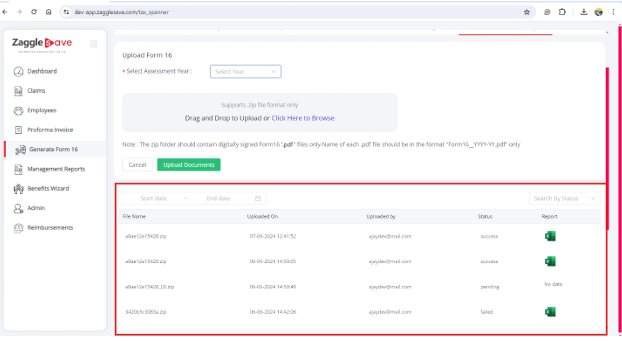
Step 18: Check file upload status
18.1: Once you click on the "Upload Document" button, the Form 16 will be sent to the
employees.
18.2: The system will send Form 16 to employees via email and EMS/SAVE mobile app
(if applicable).
18.3: You can check the file upload status whether it is successful, pending, or failed.
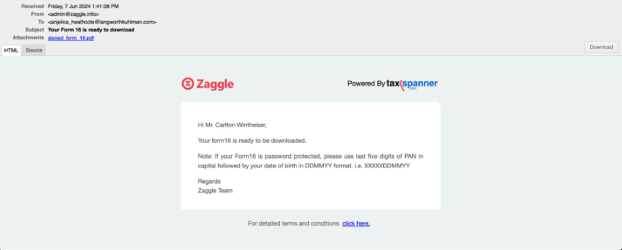
Step 19: Form 16 attachment
19.1: Once the file is uploaded successfully, the end-user will receive an email
containing the Form 16 and instructions of how to access the password-protected
Form 16.
Try TaxSpanner today.
End-to-end tax compliance for individuals, professionals and businesses — in one platform.